A Simple Way to Put Your Static Website Online Using AWS S3 for Free
As a developer, you’ve just built your site and now you’re ready to make it live on the internet—without spending money on hosting. You’re searching for an easy and free solution. In this blog, we’ll explore how Amazon S3 is a paradise for hosting your static website for free, making your project accessible to the world with minimal effort.
What is a Static Website?
A static website consists of fixed files such as HTML, CSS, JavaScript, and images. It doesn’t rely on a live database or server-side processing like PHP or WordPress. When a user visits your site, the browser simply loads and displays these static files—fast and simple.
Static websites are ideal for:
- Portfolios and personal blogs
- Documentation pages
- Landing pages
- Project demos
They are lightweight, secure, and incredibly easy to deploy—especially on AWS S3.
Why Use AWS S3 for Hosting?
Amazon Simple Storage Service (S3) is a cloud storage service that allows you to store and retrieve any amount of data at any time. While S3 is primarily designed for object storage, it also has a built-in feature for hosting static websites.
Here are some reasons why AWS S3 is a great choice for hosting your static website:
- Cost-Effective: AWS S3 offers a free tier that includes 5 GB of standard storage and 20,000 GET requests per month for the first 12 months—more than enough for small static websites.
- Scalability: S3 automatically scales to handle any amount of traffic, so you don’t need to worry about server capacity.
- Reliability: AWS S3 is designed for 99.999999999% durability, ensuring your website files are safe and accessible.
- Ease of Use: Setting up a static website on S3 is straightforward, even for beginners.
Steps to Host Your Static Website on AWS S3
Here’s a step-by-step guide to get your static website online using AWS S3:
Step 1: Create an AWS Account
Go to aws.amazon.com and create an account. You’ll need to verify your email and provide a credit or debit card, but you won’t be charged if you stay within the Free Tier.
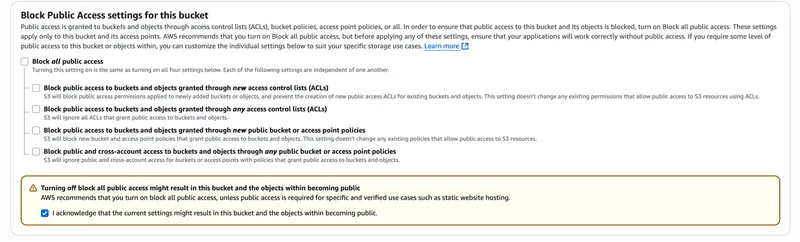
Step 2: Create an S3 Bucket
- Navigate to the S3 service in the AWS Management Console.
- Click “Create bucket” and give your bucket a unique name (this will be part of your website URL).
While creating the S3 bucket, follow these configurations:
- Uncheck “Block all public access” to allow public access to your website files.
- Acknowledge the warning about public access.
- Choose a region close to your target audience for better performance.
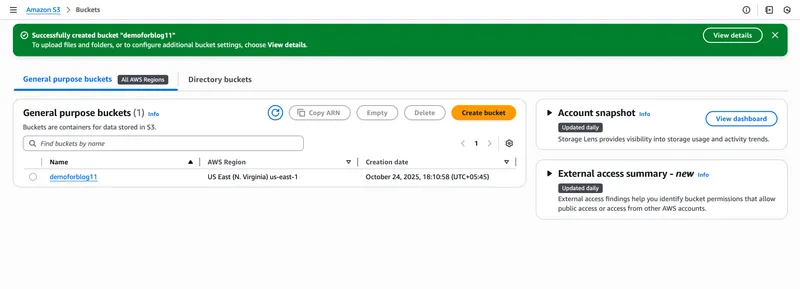
- Click the “Create bucket” button, and you’ll see a success message like this:
Step 3: Upload Your Website Files
- Click on your newly created bucket.
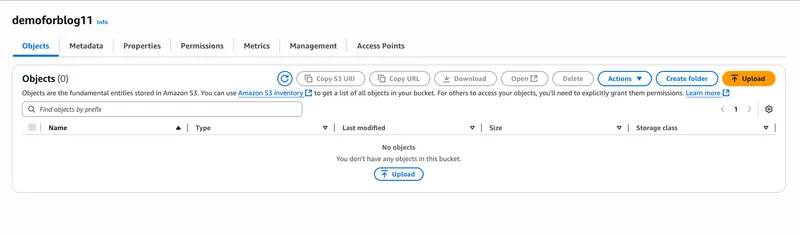
- Use the “Upload” button to upload all your static website files (HTML, CSS, JavaScript, images).

- After selecting your files, click “Upload” to start the upload process.
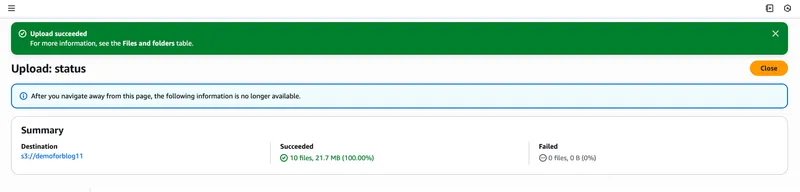
- Ensure all your files are successfully uploaded and copy the destination path of your uploaded files for future reference.
Step 4: Configure Bucket for Static Website Hosting
- Go to the “Properties” tab of your bucket.
- Scroll to “Static website hosting” and click “Edit.”
- Select “Enable” and specify the index document (e.g.,
index.html) and error document (e.g.,error.html).
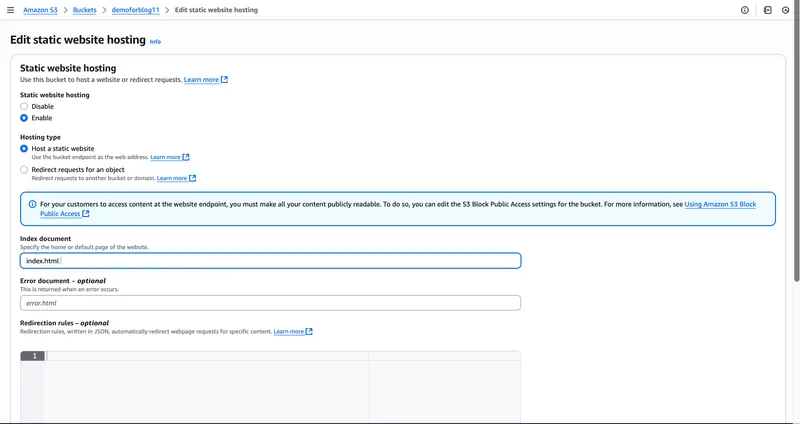
- Save changes.
Step 5: Set Bucket Policy for Public Access
- Go to the “Permissions” tab of your bucket.
- Click on “Bucket Policy” and add a policy that allows public read access to your bucket. Here’s an example policy:
{
  "Version": "2012-10-17",
  "Statement": [
    {
      "Sid": "PublicReadGetObject",
      "Effect": "Allow",
      "Principal": "*",
      "Action": "s3:GetObject",
      "Resource": "arn:aws:s3:::your-bucket-name/*"
    }
  ]
}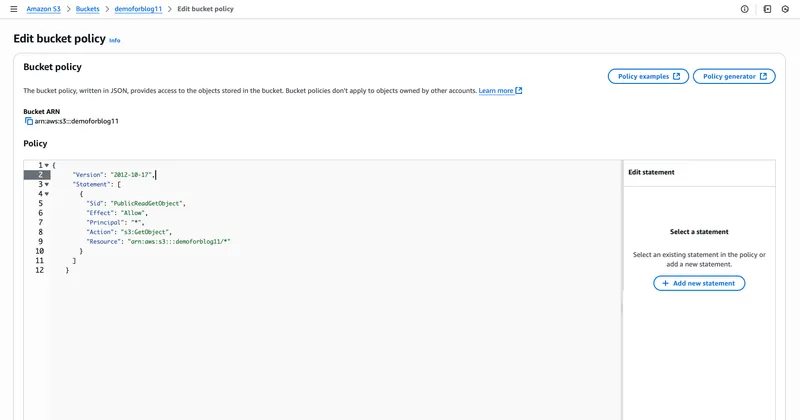
- Replace
your-bucket-namewith the name of your S3 bucket. - Save the policy.
Step 6: Access Your Website
- Return to the “Properties” tab and find the “Static website hosting” section.
- You’ll see the endpoint URL for your website (e.g.,
http://your-bucket-name.s3-website-region.amazonaws.com). - Open this URL in your browser to see your static website live!
Conclusion
Hosting a static website on AWS S3 is a simple, cost-effective way to get your project online. With just a few steps, you can make your site accessible to the world without worrying about server management or costs. Whether you’re showcasing a portfolio or sharing documentation, AWS S3 provides a reliable and scalable solution for your static website hosting needs. Happy hosting!
Additional Tips
- Consider using a custom domain with Amazon Route 53 for a more professional look.
- Enable AWS CloudFront for CDN capabilities to improve your website’s global load times.